Understanding the difference between a car battery’s positive (+) and negative (–) terminals is essential for every driver. At Three Brothers Auto Repair in New Jersey, we often explain this to our customers in simple terms. In any 12-volt car battery, there is one positive terminal and one negative terminal. The positive side (marked with a + sign) supplies power to the vehicle’s electrical systems, while the negative side (marked with a – sign) provides the ground return path. Most batteries color-code these terminals – red for positive and black for negative – and even put plastic covers on the positive post to prevent accidental shorting. Always double-check the markings: look for the stamped + o – on the battery case or the red/black color of the cable. In fact, industry guidelines note it’s “important to correctly identify the positive and negative terminals before you connect, disconnect or jump-start a battery”.
- Identifying Positive and Negative Terminals
- Connecting and Handling Terminals Safely
- Maintenance and Best Practices
- Positive vs Negative Battery Terminals Table
- Staying Safe Around Your Car Battery
- Which side is positive and which is negative on a car battery?
- Do I connect black or red first?
- What happens if I mix up positive and negative wires?
- How can I tell positive and negative terminals apart?
Identifying Positive and Negative Terminals
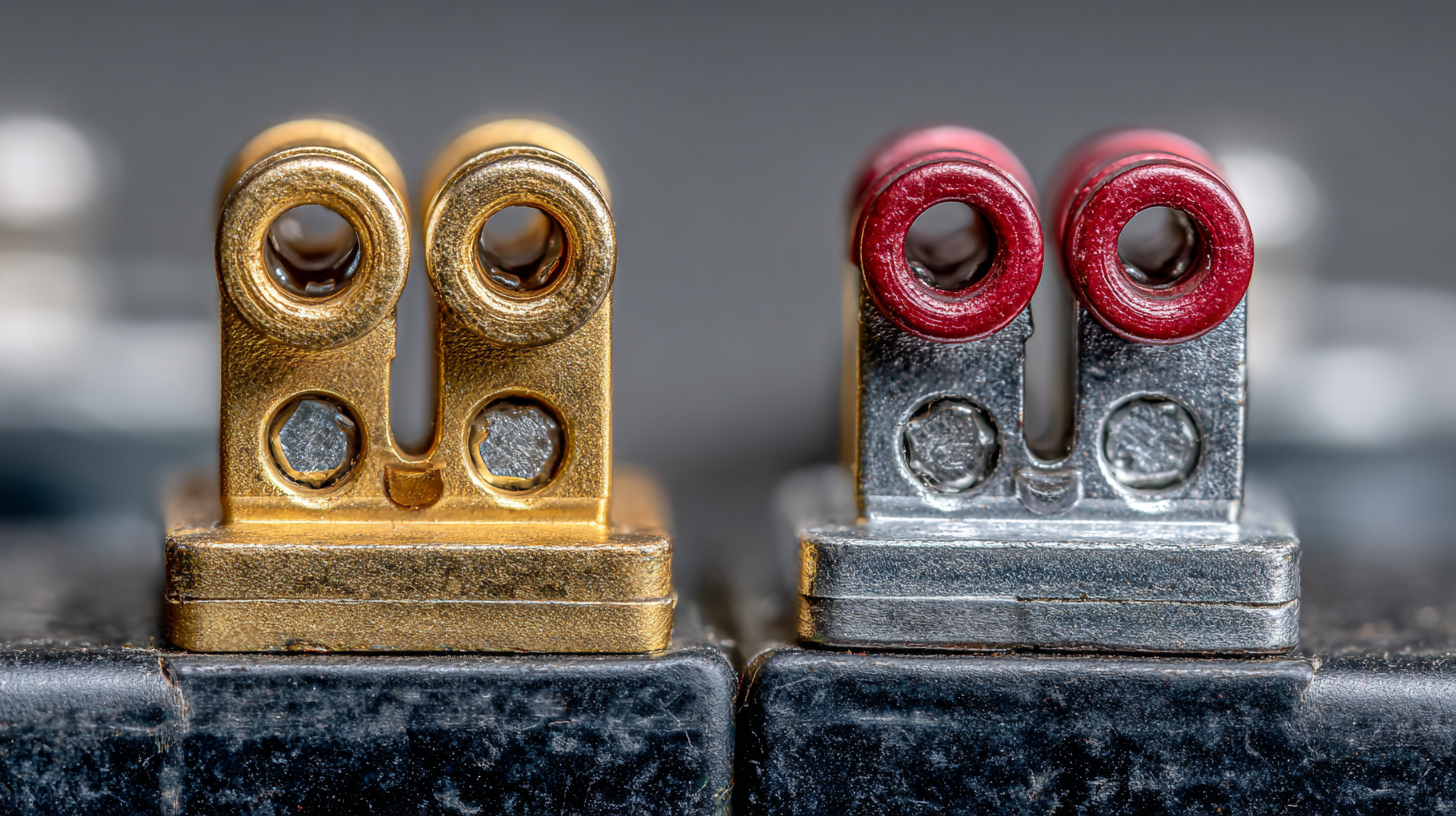
Most car batteries clearly label each post. As Batteries Plus explains, one terminal will have a “+” symbol and is sometimes called the cathode, and the other has a “–” (the anode). A quick visual check is usually enough: the positive terminal is often covered with a red plastic cap or features a red plus-sign marking, whereas the negative side is typically exposed or covered with a black cap. In our shop we always remind beginners that color conventions exist for a reason: red = positive, black = negative. However, we also warn that you can’t rely on color alone, since cables can get dirty or re-used on multiple vehicles. Always verify the “+” and “–” markings on the battery housing or next to each post.
If you ever work on an older or unmarked battery, remember this handy rule of thumb: the positive terminal post is usually slightly larger than the negative one. Both Moss Motors and industry guidelines confirm that on standard SAE-type car batteries, the positive post is “always slightly larger” than the negative. In fact, if a battery isn’t marked at all, the bigger post is the positive. We pass this tip along so our customers never get stuck guessing.
In summary, look for the “+” and “–” stamps or symbols and the red/black coloring to tell the terminals apart. A red cover on one post almost always means that is the positive side. Properly identifying these ends is critical; as one auto care guide warns, you should “correctly identify the positive and negative terminals before you attempt to connect, disconnect or jump-start your battery”.
Connecting and Handling Terminals Safely
Once you’ve identified the terminals, the next step is to connect or disconnect cables safely. We always tell our customers that connecting the wrong terminal can damage the vehicle’s electrical system or cause dangerous sparks. When jump-starting a car, for example, attach the red (positive) jumper cable to the positive (+) terminal on both batteries and the black (negative) cable to the negative (–) side of the good battery. The other end of the black cable goes to a metal ground on the car with the dead battery – not its negative terminal. The safest grounding point is an unpainted part of the engine block or chassis. This avoids sparks near battery fumes.
-
Attach the red jumper cable to the positive (+) terminal of the dead battery.
-
Attach the other end of the red cable to the positive (+) terminal of the good battery.
-
Attach the black jumper cable to the negative (–) terminal of the good battery.
-
Attach the remaining end of the black cable to a clean metal ground (engine block or chassis) on the dead car.
Safety tip: Always clamp the red (positive) cable first and remove the black (negative) cable first. This order minimizes the chance of shorting the battery or creating sparks near hydrogen gas. In fact, auto experts emphasize disconnecting the negative terminal first whenever you work on the electrical system; leaving the positive connected poses no safety risk, whereas a tool touching the positive side can short out.
Our technicians also remind drivers that in most modern vehicles the negative terminal is bonded to the car’s frame (ground). This means the body and engine act as the return path for the electrical system. Knowing this, you’ll understand why we ground the black jumper cable to the engine block instead of to the battery’s negative post. It completes the circuit without the risk of igniting battery gases. Always follow the rule: positive (red) cable on + terminal first, then negative (black) cable on ground; reverse this order when disconnecting. Doing so keeps the process safe for you and your vehicle.
Maintenance and Best Practices
Beyond jumping and replacing batteries, good maintenance will keep both terminals healthy. Corrosion and loose connections are common issues we see – especially in New Jersey’s winter, where road salt and moisture can attack the posts. To help beginners keep their batteries reliable, here are some key tips we share in our shop:
-
Keep terminals clean. Corrosion (a white or greenish powder) on the positive and negative posts can block electrical flow. Regularly inspect and clean the terminals with a wire brush and a baking soda solution if needed.
-
Use protective washers and covers. Anti-corrosion (acid-neutralizing) washers go over the posts under the cable clamps. These small, wavy metal rings help prevent rust buildup. Also be sure any plastic terminal caps are intact. Many batteries come with a red cover for the positive side – make sure it stays in place to shield the terminal from moisture and accidental tools.
-
Check cable tightness. Both the positive and negative cable clamps should be snug. A loose clamp can mimic a dead battery by preventing full current flow – for example, the engine might crank slowly or dashboard lights may flicker if a clamp is loose. At Three Brothers we always tighten and double-check connections during service.
-
Connect/disconnect correctly. We already mentioned it, but it’s worth repeating: when you attach a battery, tighten the positive terminal first, then the negative. When removing, loosen the negative terminal first, then positive. Following this order at home or in our shop reduces the risk of accidentally shorting across the battery.
By following these simple practices, you’ll greatly extend your battery’s life and avoid many common problems. If you notice significant corrosion or damage, or if your battery still struggles to start the car, it’s best to have it tested or replaced by professionals like us. Our team in East Rutherford, NJ can perform a battery health check and, if needed, install a new battery. We take care to insulate and mount the replacement properly – fitting anti-corrosion washers, securing the battery in its tray, and reconnecting cables (positive first, then negative) just as the manufacturer specifies.
Positive vs Negative Battery Terminals Table
This table summarizes the key differences between a car battery’s positive (+) and negative (–) terminals, including markings, cable color, protective covers, size, function, connection order, and safety notes.| Aspect | Positive Terminal | Negative Terminal |
|---|---|---|
| Marking | “+” sign stamped on case | “–” sign stamped on case |
| Cable Color | Usually red | Usually black |
| Protective Cover | Often has a red plastic cap | Rarely (or a black cap) |
| Physical Size | Slightly larger post | Slightly smaller post |
| Function | Supplies power to car’s electrical systems | Acts as the ground/return path |
| Connection Order | Connect first (during installation) | Disconnect first (during removal) |
| Safety Note | High risk of short if metal touches it | Safer to touch ground (low risk) |
Staying Safe Around Your Car Battery
In summary, the positive (+) battery terminal sends power out to your car’s electrical system, and the negative (–) terminal completes the circuit back to ground. Although it may seem obvious once you know it, identifying these terminals correctly is the first step in any battery-related task. Remember that red means positive and black means negative (but always confirm the markings), and heed the safety rule of connecting positive first and negative last. Regularly inspect and clean both terminals, keep covers in place, and ensure tight connections to avoid trouble. When in doubt, feel free to reach out to us at Three Brothers Auto Repair. We’re happy to advise New Jersey drivers on safe battery handling – because with these basics under your belt, you’ll keep your car running reliably and safely.
-
Which side is positive and which is negative on a car battery?
The positive terminal is usually marked with a plus sign (+) and covered with a red cap or cable. The negative terminal is marked with a minus sign (–) and connected with a black cable.
-
Do I connect black or red first?
When connecting a car battery, always attach the red (positive) cable first, then the black (negative). When disconnecting, reverse the order — remove the black cable first, then the red.
-
What happens if I mix up positive and negative wires?
Reversing the cables can cause sparks, electrical damage, or even fry your car’s electronic systems. Always double-check markings before connecting jumper cables or installing a new battery.
-
How can I tell positive and negative terminals apart?
Look for the “+” and “–” symbols on the battery case, and note the cable colors — red for positive and black for negative. The positive post is often slightly larger in diameter than the negative one.